Nunor Bora

Author: Afelia's Kitchen
Serves: 70 -80
Ingredients
- 1 pint water
- 2 large OR 4 small onions
- 1 large stem of ginger (thumb size piece)
- 2 tsp salt
- 1½ tsp turmeric
- ½ tsp of panch puran (optional)
- 2 cups rice flour (approx 300g)
- ⅔ cup ground rice (approx 120g)
- chopped coriander (optional)
Method
- Start by bringing to boil 1 pint of cold water in a large saucepan.
- Meanwhile peel and chop the onions and peel the stem of ginger. I am using my mini chopper to blend the onions and ginger, if you don't have this use a food processor or a grater, the onions and ginger should be finely blended.
- Add the blended ingredients to the boiling water along with 2 tsp of salt, 1.5 tsp of turmeric powder and the last ingredient is optional ½ tsp of ground panch puran; the ground panch puran adds a really lovely taste and aroma but isn't too overpowering.
- After adding the salt/spices cover and leave to simmer for 10 mins.
- After 10 mins check to see if the onions look translucent and cooked (top right photo), when they do you are ready to add the rice flour/ground rice. Turn the heat down to low and add 2 cups of rice flour, followed by ⅔ of a cup of ground rice, the flours will be absorbed into the liquid immediately....
- stir the flour/ground rice using a wooden spoon and ensure that there are no dry patches (top right photo). If you want to add coriander (optional but also adds a lovely fragrance and colour to the boras) now is the time to add it; I added 3 tbsp of chopped frozen coriander.
- Mix well, cover and leave to cook for about 15 - 20 minutes over a low flame. You will know when the dough is ready as there will be water droplets forming on the lid (it helps to do this in a pot with a glass lid for this reason) and the mixture will release a lovely aroma once cooked.
- To check the dough is fully cooked, take a pinch of the mixture and roll back and forth between you fingers, it should come together quite easily. If for any reason it feels too sticky, add some more rice flour to absorb the moisture; if it feels too dry, sprinkle a little water over and allow to steam for a few more minutes.
- Once the dough is ready take some out of the pan and allow to cool on the counter. I found the dough mix was a little wet while hot so added some rice flour to aid me rolling it together.
- Using the base of your palm, knead the mixture thoroughly against the counter, as you do so you will find the mixture comes together....
- to form a ball of dough. I like to use my dough scraper to remove any dough stuck to the worktop.
- Carry on kneading the mixture till you have formed several balls of dough.
- Next you want to take a ball of dough and using a rolling pin roll it out as shown in the top left photo. I like a medium thickness of about 3 - 4mm for my Nunor Bora (not too thick and not too thin), as shown in the top right photo.
- Cut the rolled out dough using a pastry cutter; my pastry cutter has a crimped edge but a plain one is fine too. If you don't own a pastry cutter you may use a sharp rounded lid or object to cut a clean round. Starting at the edge work your way round the pastry until you have cut out as many Nunor Bora as you can.
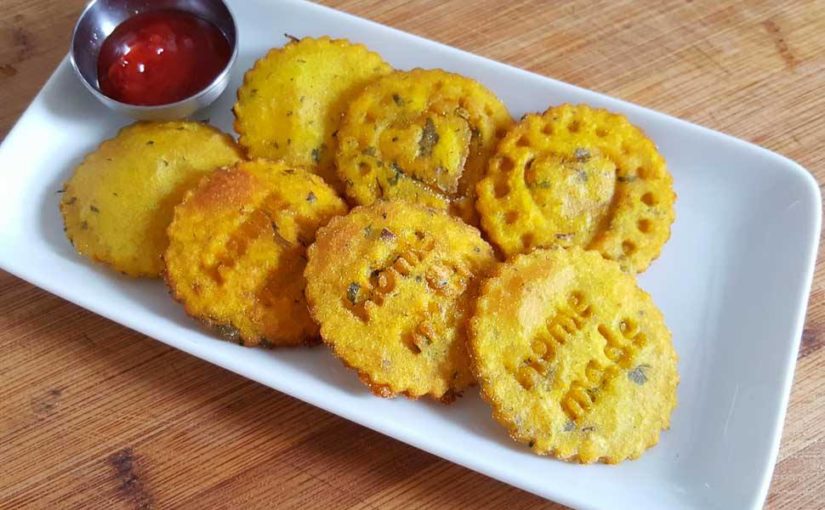
- After cutting my Nunor Bora I like to personalise them using a cookie stamp, this adds a really unique finishing touch to homemade snacks.
- Taking my cookie stamp, I gently press down on the boras one at a time till I can see the stamped lettering. Do this for as many boras as you like.
- Take the remaining scraps and roll them back into a a round ball, repeat the process of rolling out and cutting till all the dough has been used up.
- I like to place my Nunor Bora on flexible plastic chopping boards in the freezer to harden up, this makes them easy to remove and place in a bag/container. You can also place more than one layer on top of one another this way.
- Once the boras are hard, transfer them to a container/freezer bag.
- To cook the boras heat a large wok with some oil. Once the oil is hot slide in the boras carefully from frozen, you may want to defrost them for a minute or so to make them splutter less in the oil. Make sure the oil is HOT before adding the boras otherwise they will absorb a lot of oil, won't puff up and won't be crispy.
- Place the cooked boras onto a piece of kitchen paper to absorb all the excess oil.
- Serve the Nunor Boras immediately just as, with ketchup/chilli sauce or enjoy them with your favourite curry!
Recipe by www.afeliaskitchen.com at https://www.afeliaskitchen.com/nunor-bora/