Guror Handesh
Prep time
Cook time
Total time
Author: Afelia's Kitchen
Serves: 35 - 30
Ingredients
- 2 level cups of rice flour (approx. 320g)
- 1 level cup of plain flour (approx. 145g)
- 1 level cup of morsa gur/date molasses (approx. 320g)
- ¼ cup white granulated sugar (approx. 50g)
- tepid water as needed (as a rough guide I used 250ml, which is equivalent to ½ a pint but this will depend if your morsa gur is hard or soft to begin with, my gur was soft and runny so adjust this amount as necessary)
Method
- In a large mixing bowl start by adding 2 level cups of rice flour (approx. 320g), 1 level cup of plain flour (approx. 145g)….
- ….1 level cup of gur/date molasses (approx. 320g) and ¼ cup of white granulated sugar (approx. 50g).
- You then want to add water to the ingredients in the bowl.
- Make sure your hands are clean and using tepid water (water should not be too cold) gradually add enough water to make a very thick batter (at this stage add no more than 150ml, you can add more as you progress). As you mix the batter crumble any large lumps of flour, gur or sugar. It is best to use your hands for this process as it not only helps you to feel where the lumps are, I believe it makes the batter fluffier, much like how a good dosa batter requires you to mix the batter using your hands. Trust me on this one!
- In total I used about 250ml water (1/2 a pint) but this may vary depending on how solid or soft your gur/date molasses is to begin with. Keep adding water a little at a time until you have a batter that pours in a constant stream without breaking, watch the accompanying video to see the consistency you are looking for.
- Rather than fixate on how much water I have used in this recipe, use the water measurement as a rough guide but look for the correct consistency, as this will ensure better and more accurate results. Put simply, the batter shouldn’t be too thick or too thin. However if the batter seems too thick after adding the recommended amount of water, add more water a little at a time till you get the right consistency. If however you add too much water by accident, add more flour to correct this. Once you have the desired consistency allow the batter to rest for 4 – 5 hours, I believe when the flours are given time to rest and fully absorb the liquid in the batter, it produces a better handesh.
- Cover the bowl with clingfilm (saran wrap), and leave to rest for at least 4 – 5 hours at room temperature, do not chill or refrigerate the batter. You may leave the batter overnight if you prefer, however I prefer making the batter during the day and frying later in the evening, I don’t like leaving the batter to sit for too long if I can help it (I did leave it overnight on the day I filmed the video though, ooops, lol!).
- In a large wok, heat a generous amount of oil, the oil should be heated to SMOKING POINT and then TURNED DOWN before adding the first batch of batter. This will ensure the oil is hot in order for the handesh to puff up immediately when added to the pan and rise to the surface. Fry the handesh over a medium flame after initially heating the oil.
- I use a cup to pour my batter, you may use a jug or ladle depending on what you prefer. Pour the batter directly in the CENTRE of the wok and wait a few seconds for the handesh to rise to the top without any assistance.
- You will see the handesh puff up slowly and rise to the surface, don’t turn the handesh over yet, just use a spoon and move it away from the centre of the pan and let it cook around the inside edge of the pan till the underside looks a brown colour.
- Once the underside looks brown, turn over and cook the other side, you should find the handesh turn over easily when the underside is cooked properly. It should take between 25 - 30 seconds to cook on each side.
- Once both sides look brown and evenly cooked, use a slotted spoon and remove the handesh, place on kitchen paper to absorb all the excess oil. Make sure the outside of each handesh isn’t browning too fast and the centre of the handesh is also cooking through fully, by tearing one apart and checking the inside is cooked.
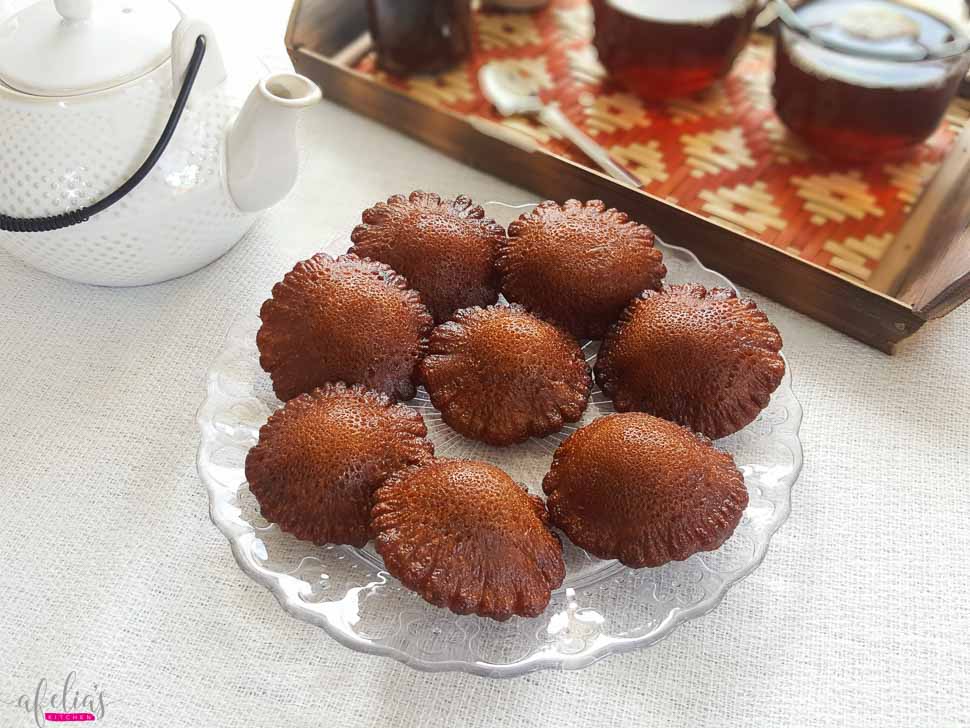
- The handesh should have beautiful ruffles on the edges provided you have followed all the steps properly. Enjoy eating your handesh hot with a cup of tea or warm a bowl of milk up and tear the handesh into small pieces and enjoy like you would cereal, delicious either way!
Recipe by www.afeliaskitchen.com at https://www.afeliaskitchen.com/guror-handesh/