Everyone loves dessert. In fact for some people it’s the best part of a meal. Whilst I’m not really a sweet toothed individual (give me cheese or a packet of crisps over a bar of chocolate any day), I do love a good dairy dessert, yes dairy because anything that involves creamy, buttery, dairy goodness was made to be loved! Add some chocolate into the mix to create these Chocolate Dessert shots and you’re onto a complete winner.
This recipe is a fairly recent development, inspired by my love of tiramisu (a sponge finger and mascarpone layer cake, which I must admit I haven’t made in a while) and an abundant supply of chocolate sponge fingers I had laying around the house. I was going to my sister’s house one evening and promised to take along dessert, this would be my chance to try out this recipe on a group of hungry, but nevertheless critical, critters. The recipe didn’t fail me either, the shots were gone within minutes with some of my hardest critics (aka my children) complaining the portions weren’t big enough, lol!
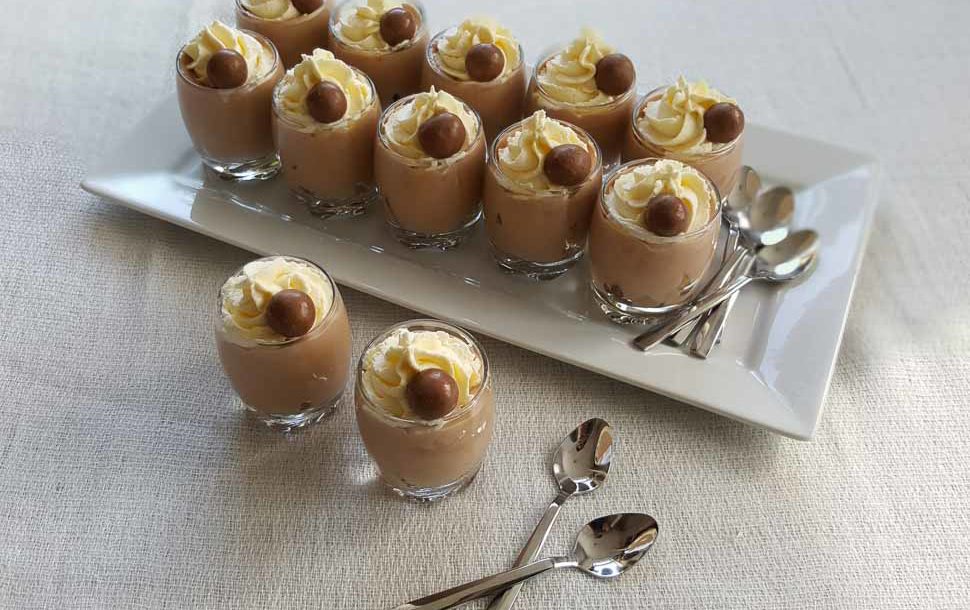
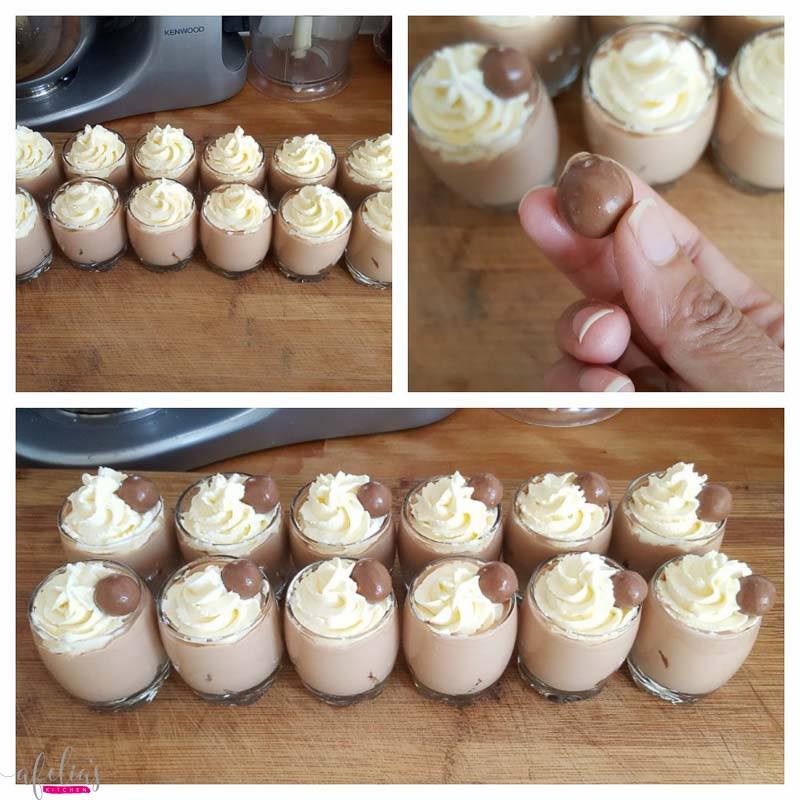
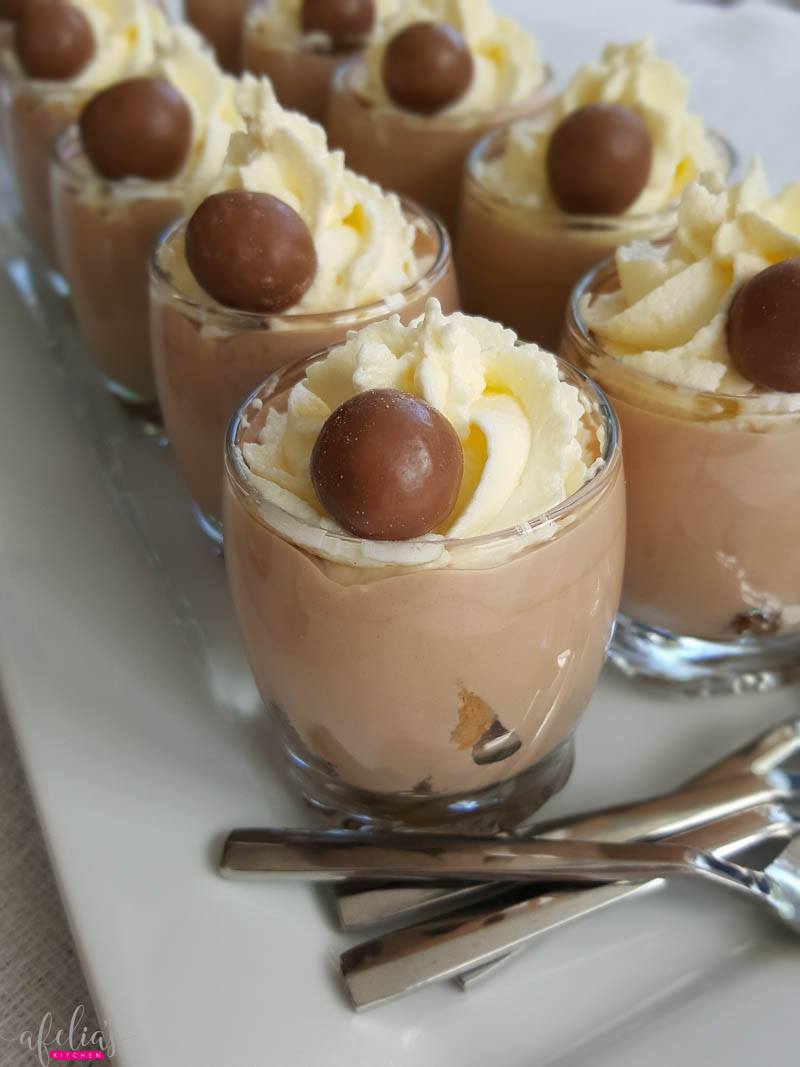
The dessert starts with a base of coffee flavoured sponge fingers, has a middle layer of chocolate-y mousse and is topped off with a final layer of light and airy whipped cream…..I know, sounds heavenly right? Wait till you taste it! Oh and how can I forget the finishing touch, a chocolate Malteser, although if you wanted to be good, you could easily use fruit instead.
I have used chocolate flavoured sponge fingers in this recipe, although they are more commonly available plain from most major supermarkets, use whatever type you are able to source locally, the recipe will work with either type. The sponge fingers are soaked with a sweetened coffee solution, if you’re not a big fan of coffee you may want to soak the sponge fingers with a hot chocolate drink using milk/water instead, the main point being to soak the fingers so that they are moist and flavoursome once chilled.
A couple of tips to help you whip the middle layer to mousse-y perfection. 1. After melting the chocolate and double cream together in the microwave (or over a double boiler) allow the mixture to cool and then chill in the freezer for 15 – 20 minutes, chilling the mixture helps it to whip easily, if the mixture is still warm it is very difficult to whip and will remain runny. 2. When whipping the melted chocolate mixture look for the consistency of a slightly thick but pourable custard rather than soft peaks of whipped cream, you must be able to pour the chocolate mixture into your shot glasses rather than spoon it in.
The final layer of whipped cream is super simple and you merely need to add some granulated sugar to the double cream, whisk together and then fill a piping bag to pipe the swirly tops. If you don’t have piping bags or nozzles, you can just spoon the cream over the top, may not be as attractive as piping but it IS just as tasty.
I hope you all find the recipe easy to follow and it goes down as well as it has done with my family!
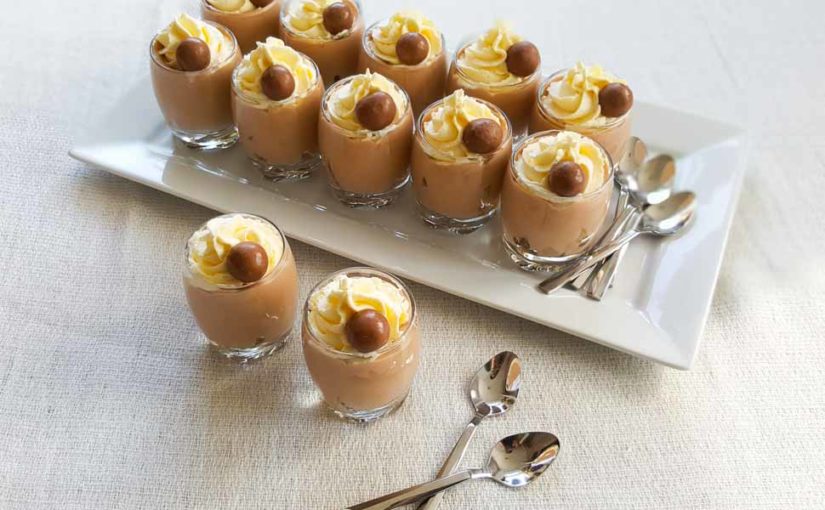
Makes 12 shot glasses
You will need: for Chocolate Dessert Shots
200ml of sweetened dark coffee solution (dilute 1 tsp of sugar and 1 tsp of instant coffee granules in 200ml of boiling water)
2 pots of double cream (approx 300ml each)
100g of milk chocolate (I used chocolate chips but a bar of milk chocolate will work too)
2 tbsp granulated sugar
1 pack of sponge fingers (you will need at least 8 sponge fingers for this recipe)
chocolate Maltesers OR a chocolate/fruit of your choice to garnish (optional)
Method:

Start by making a sweetened dark coffee solution; dissolve 1 tsp of sugar and 1 tsp of instant coffee granules in 200ml of boiling water. Leave to cool to one side.
In a clean microwaveable bowl place 100g of milk chocolate, if you are using a bar of chocolate, cut the chocolate up into smaller pieces to make it easier to melt.
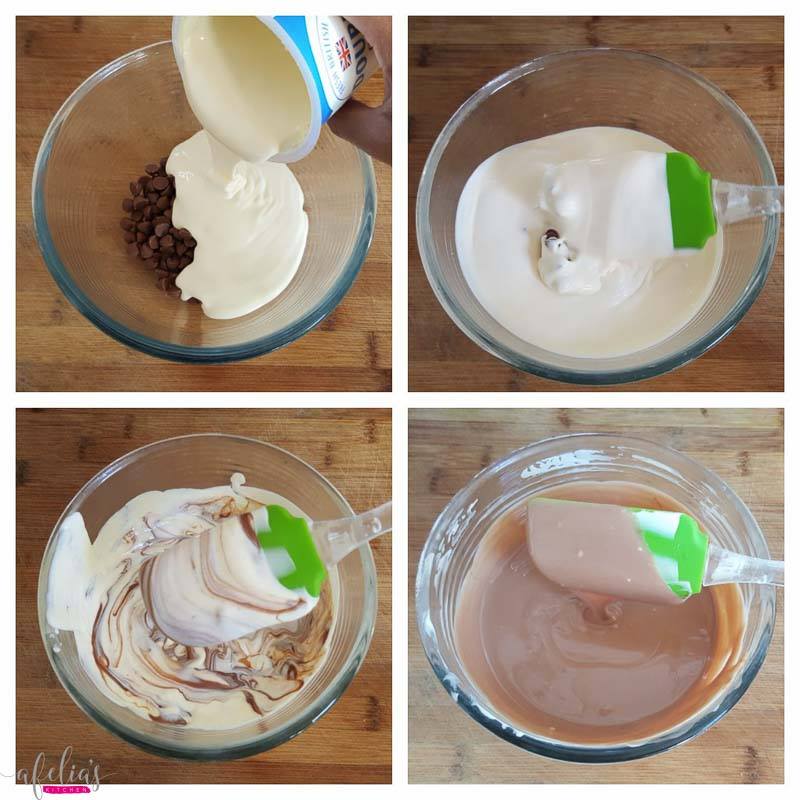
Pour one pot of double cream over the chocolate and heat in the microwave in short 30 second bursts.
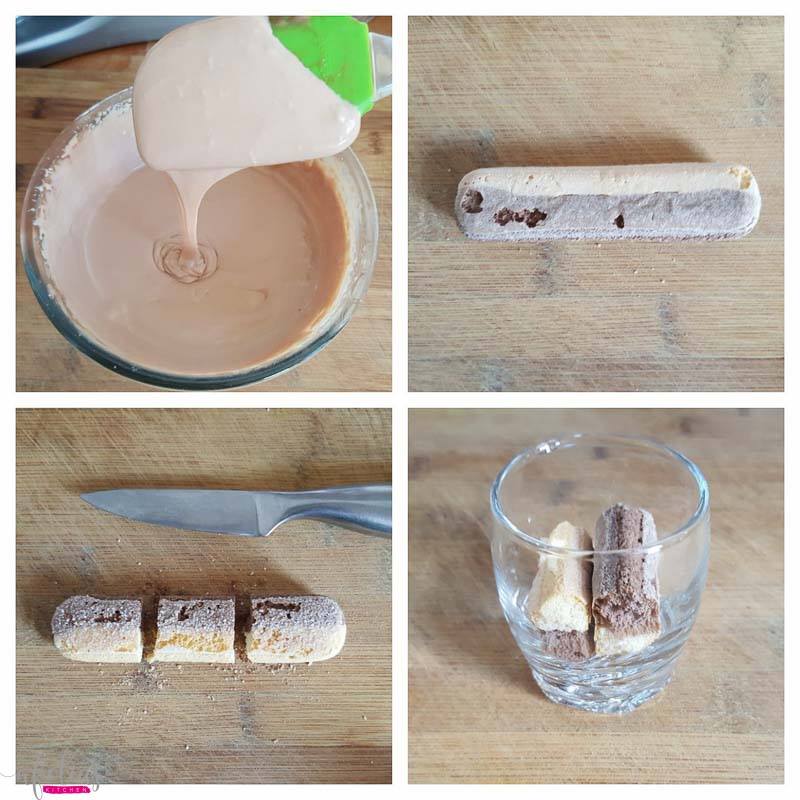
Use a spatula or spoon to mix in between, until the two ingredients are fully combined (bottom right photo).
Cool the mixture and then chill – I usually place the bowl in the freezer for 15 – 20 minutes to speed this up. The mixture will be whisked after chilling, if the entire mixture is NOT CHILLED properly it will NOT WHIP.
In the meantime prepare the remaining ingredients.
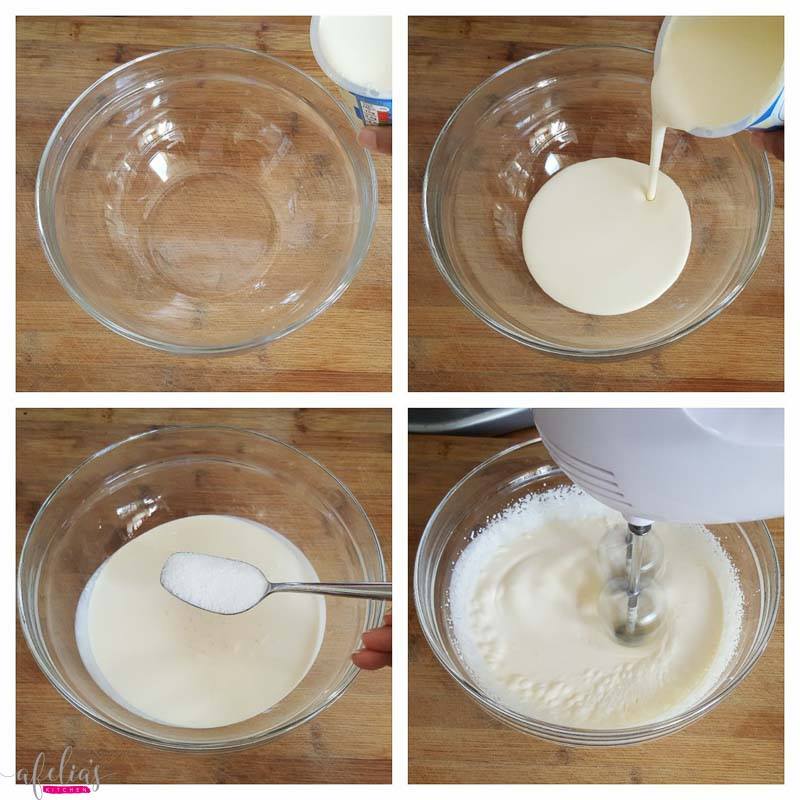
In another clean bowl pour the remaining pot of double cream, add 2 tbsp of sugar and whisk using a handheld mixer.
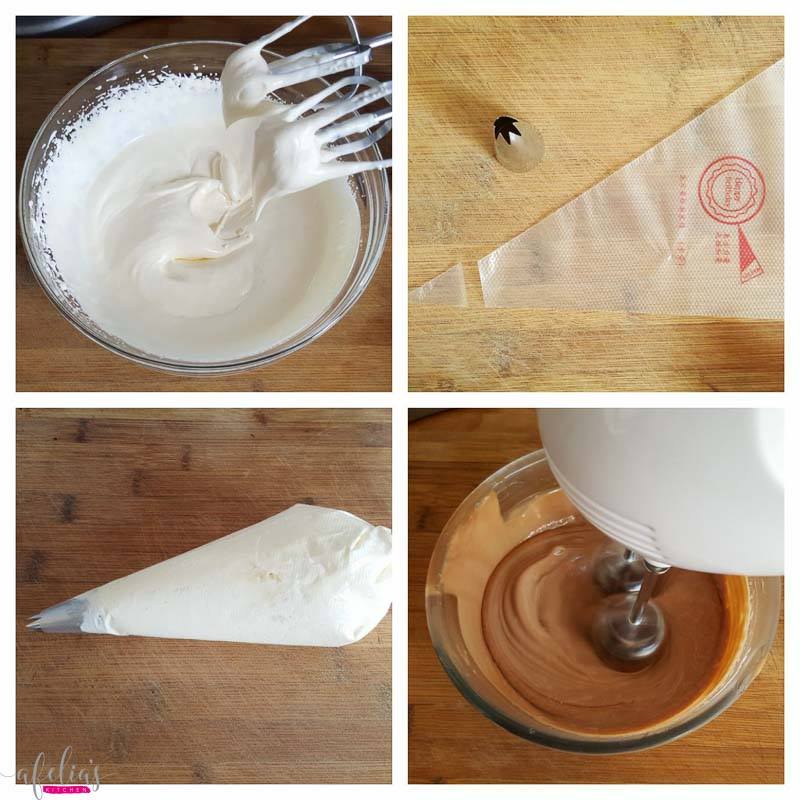
Whip the cream until you have soft peaks – be careful not to over whip, it is better to under whip the cream than over whip.
Prepare a disposable piping bag by snipping off the tip and place a Wilton 1M piping nozzle inside.
Fill the piping bag with the whipped cream, twist the top of the bag tightly and leave to one side till needed.
Once the chocolate mixture is completely chilled, whisk using your handheld mixer….
….until the mixture resembles custard of a pouring consistency (top left photo). This can take up to 7 – 8 minutes to whip, if the mixture is still warm it will not whip or thicken, place it back in the freezer to chill some more if you find it doesn’t start to thicken and try again until you reach the desired consistency.
Next take one sponge finger and cut into 3 equal pieces.
Place two pieces into each shot glass, try laying them upright or flat if you find making them fit difficult. I found for these glasses laying them flat worked best, whereas on my previous attempt placing them upright worked better as the glasses were taller and narrower. Play around and see what works best for the glasses you are using.
Repeat the process for all of the glasses.
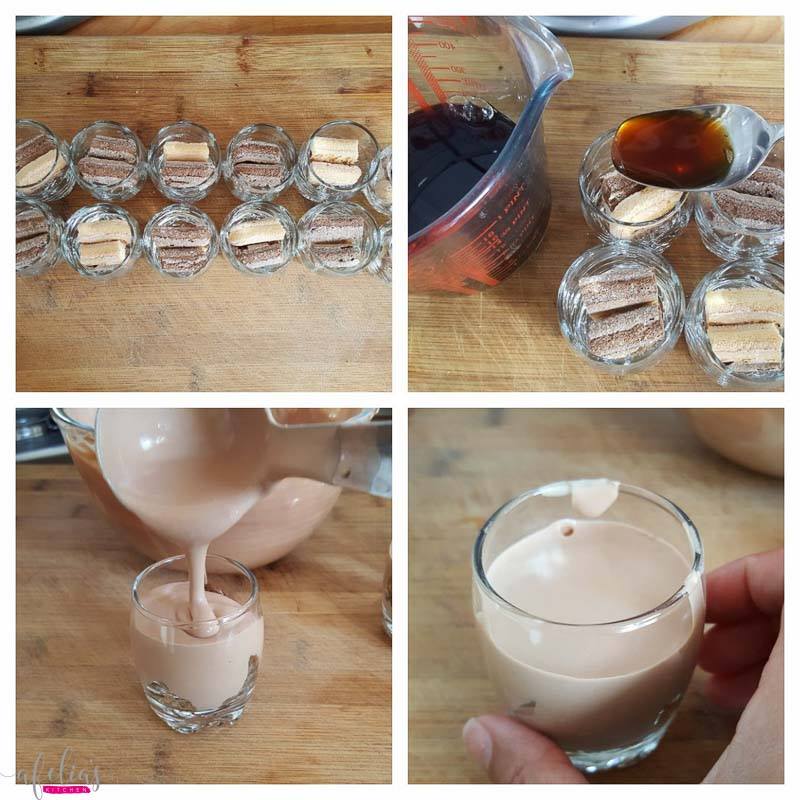
Next take the cooled coffee solution and pour 1 tbsp over the sponge fingers in each of the shot glasses (top right photo). Repeat for all 12 glasses, discard any remaining coffee solution.
Then using a spoon or ladle, pour over the whipped chocolate mixture (bottom left photo). Clean up any spills to the side of the glasses immediately as you go.
Tap the glasses to help bring up any air bubbles to the surface (bottom right photo), burst any air bubbles which have difficulty rising using a toothpick.
Repeat the process for all the glasses and use up as much of the chocolate mixture as possible, ensuring you leave a small gap at the top of the shot glasses for piping the remaining whipped cream.
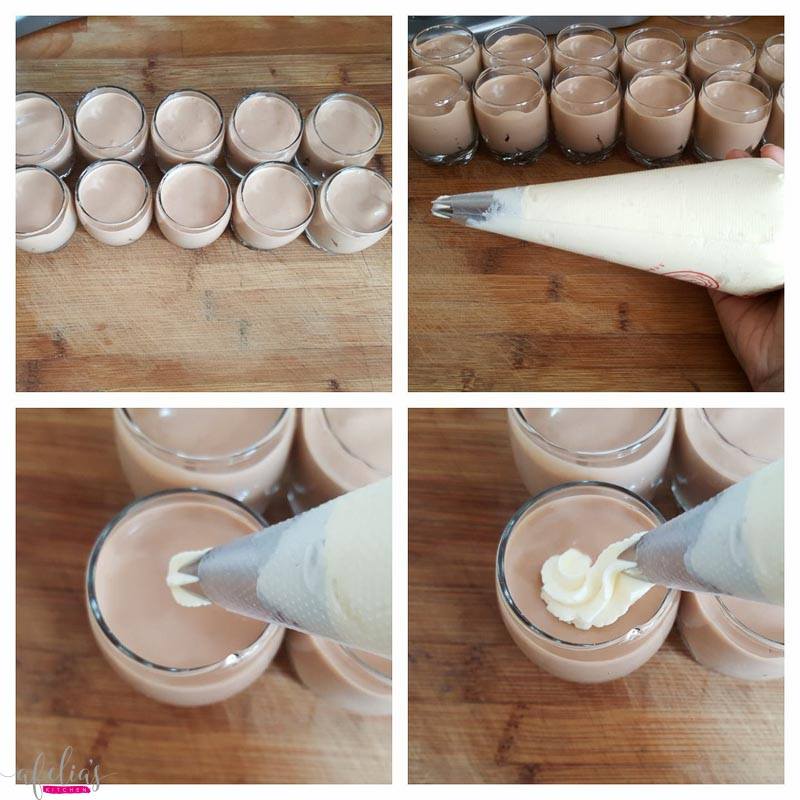
Once you have filled the glasses with the chocolate mixture, begin to pipe the whipped cream on top.
Start in the centre of each shot glass, and pipe a swirl….
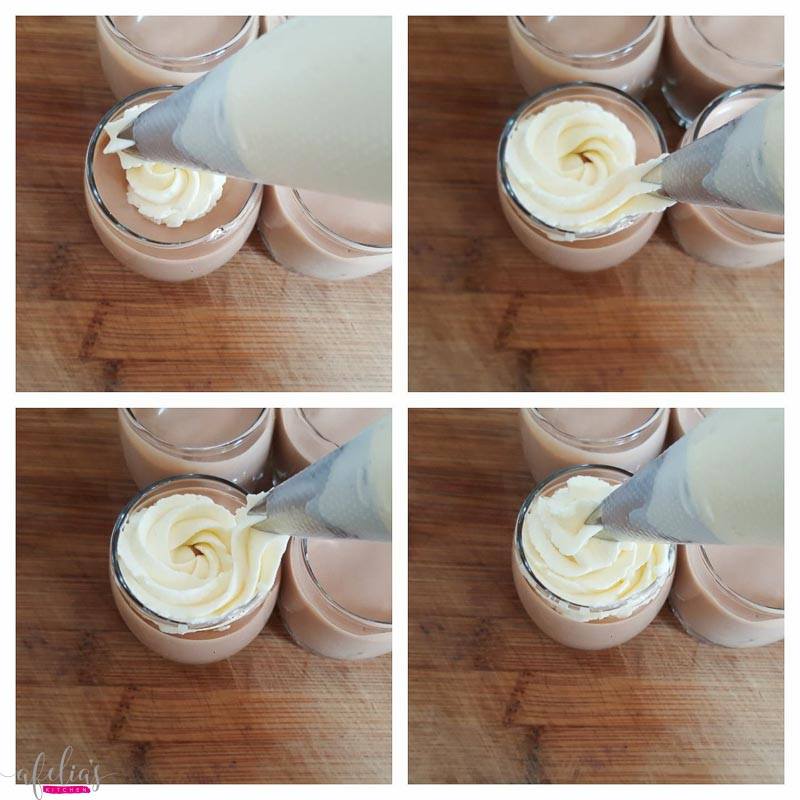
….bring the cream around the inner rim of the glass and pipe upwards, finish with an ice cream style swirl on the top.
Repeat piping cream on all 12 glasses.
Finally, garnish the top of your cream swirls with one chocolate (or fruit) of your choice, I have used Maltesers. Chill the dessert shots until it’s time to serve.
These can be made a day in advance and kept refrigerated.
Watch the delight on everyone’s faces as they enjoy bite after bite of this dessert, just make sure you grab a glass for yourself, they’ll be gone in a shot!
Bon Appetit!
- 200ml of dark coffee (dilute 1 tsp of sugar and 1 tsp of instant coffee granules in 200ml of boiling water)
- 2 pots of double cream (approx 250ml each)
- 100g of milk chocolate (or dark if you prefer)
- 2 tbsp granulated sugar
- 1 pack of spongefingers
- chocolate Maltesers OR a chocolate/fruit of your choice to garnish (optional)
- Start by making a sweetened dark coffee solution; dissolve 1 tsp of sugar and 1 tsp of instant coffee granules in 200ml of boiling water. Leave to cool to one side.
- In a clean microwaveable bowl place 100g of milk chocolate, if you are using a bar of chocolate, cut the chocolate up into smaller pieces to make it easier to melt.
- Pour one pot of double cream over the chocolate and heat in the microwave in short 30 second bursts.
- Use a spatula or spoon to mix in between, until the two ingredients are fully combined (bottom right photo).
- Cool the mixture and then chill - I usually place the bowl in the freezer for 15 - 20 minutes to speed this up. The mixture will be whisked after chilling, if the entire mixture is NOT CHILLED properly it will NOT WHIP.
- In the meantime prepare the remaining ingredients.
- In another clean bowl pour the remaining pot of double cream, add 2 tbsp of sugar and whisk using a handheld mixer.
- Whip the cream until you have soft peaks - be careful not to over whip, it is better to under whip the cream than over whip.
- Prepare a disposable piping bag by snipping off the tip and place a Wilton 1M piping nozzle inside.
- Fill the piping bag with the whipped cream, twist the top of the bag tightly and leave to one side till needed.
- Once the chocolate mixture is completely chilled, whisk using your handheld mixer....
- until the mixture resembles custard of a pouring consistency (top left photo). This can take up to 7 - 8 minutes to whip, if the mixture is still warm it will not whip or thicken, place it back in the freezer to chill some more if you find it doesn't start to thicken and try again until you reach the desired consistency.
- Next take one sponge finger and cut into 3 equal pieces.
- Place two pieces into each shot glass, try laying them upright or flat if you find making them fit difficult. I found for these glasses laying them flat worked best, whereas on my previous attempt placing them upright worked better as the glasses were taller and narrower. Play around and see what works best for the glasses you are using.
- Repeat the process for all of the glasses.
- Next take the cooled coffee solution and pour 1 tbsp over the sponge fingers in each of the shot glasses (top right photo). Repeat for all 12 glasses, discard any remaining coffee solution.
- Then using a spoon or ladle, pour over the whipped chocolate mixture (bottom left photo). Clean up any spills to the side of the glasses immediately as you go.
- Tap the glasses to help bring up any air bubbles to the surface (bottom right photo), burst any air bubbles which have difficulty rising using a toothpick.
- Repeat the process for all the glasses and use up as much of the chocolate mixture as possible, ensuring you leave a small gap at the top of the shot glasses for piping the remaining whipped cream.
- Once you have filled the glasses with the chocolate mixture, begin to pipe the whipped cream on top.
- Start in the centre of each shot glass, and pipe a swirl....
- bring the cream around the inner rim of the glass and pipe upwards, finish with an ice cream style swirl on the top.
- Repeat piping cream on all 12 glasses.
- Finally, garnish the top of your cream swirls with one chocolate (or fruit) of your choice, I have used Maltesers. Chill the dessert shots until it's time to serve.
- These can be made a day in advance and kept refrigerated.
- Watch the delight on everyone's faces as they enjoy bite after bite of this dessert, just make sure you grab a glass for yourself, they'll be gone in a shot!
If you like the recipe please share with friends and family, also follow me on Facebook and Instagram. Questions? Leave a comment below or message me on Facebook.


Sharmin
Tried this the other day (without the whipped cream on top) as we had chocolate and double cream at hand. Brilliant dessert and super easy to do. Its basically a halal chocolate mousse or almost like a chocolate tiramisu style – it was perfect post iftar and not too sweet/ rich.
Thanks for this – will be a staple recipe for us.
Sabz
Can I ask, if you don’t have a handheld mixer is it still possible to whip the cream with a normal whisk? Or is that too difficult to achieve the desired peaks?
afelia’s kitchen
No it should be fine but you may have an aching arm by the end of it! x
Shima
Made this last Ramadan and was a great hit with my family. I actually enjoyed making it whereas normally I’m not a fan of making sweet stuff. Will be making again soon in an Allah x
afelia’s kitchen
Brilliant, I think I should make some too! 🙂
Rafina
Made these other day for a family gathering it was super easy to make n tasted delicious just a handful of ingtediants an u get a yummmy dessert. Thank u for sharing xxx
afelia’s kitchen
Aww thank you for the feedback, so happy they went down well. 🙂
A.K
This recipe seems soo easy and looks delicious,I would love to try this recipe,but we don’t have sponge fingers here easily available,what can I replace it with?
afelia’s kitchen
Use sponge cake instead and it should still work. Let me know how it goes 🙂
Reena
Hi..have u used whipping cream or can we use any usual tetra pack cream bought from market?
afelia’s kitchen
I used double cream, not sure what the tetra packs from the market are to be honest.
Wania
Where did you buy the dessert shot glasses from?
afelia’s kitchen
They were from Sainsburys.
Fateha
Made this to take to an iftar dawat today…as always easy to follow and VERY simple ingredients
I highly recommend you all try these especially if you ❤️ chocolate
Thank you as always for sharing and looking forward to more recipes x
afelia’s kitchen
I hope your guests enjoyed the dessert shots…….thank you for trying out the recipe, hope you enjoy some of my others too! 🙂 xx
Saba
Excellent recipe I tried and turn out yummmmliushus……
afelia’s kitchen
Thanks for the review, so happy you loved it! 😀 x