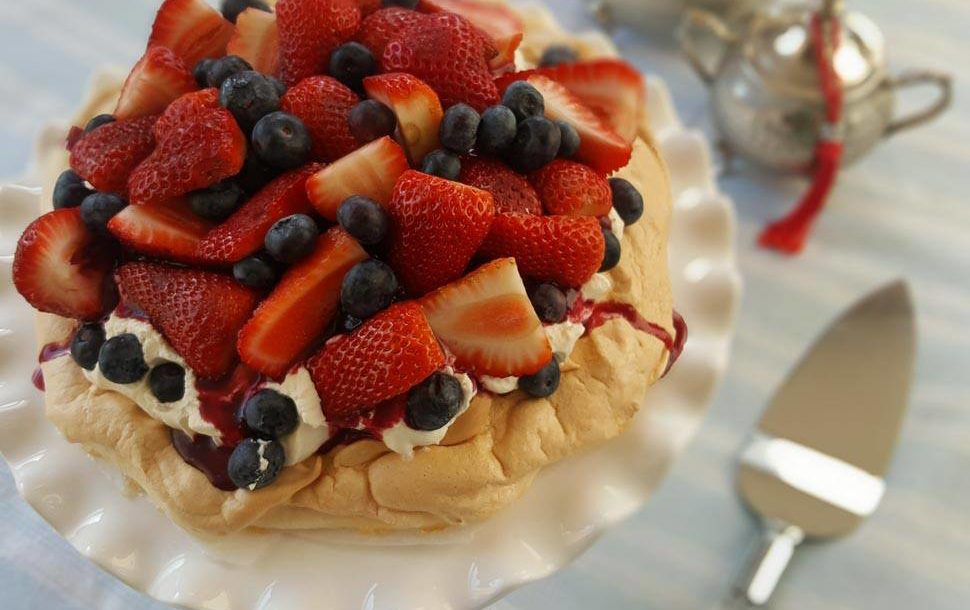
The summer season brings with it an abundance of summer fruits and what better way to enjoy some of these delicious seasonal goodies than to bake a mouthwatering pavlova? Afelia’s Fruity Summer Pavlova is one of my most requested desserts and is a favourite for summer and indeed during Ramadan, because of how light and fruity it is. After a heavy meal this makes the perfect dessert; it’s not too heavy and not too sweet, creating the perfect balance.
A pavlova is a meringue based dessert, although it isn’t a meringue in the true sense of the word, in that it isn’t dry and crispy all the way through as meringues typically should be. A pavlova has a crispy melt in your mouth outer crust, with a soft, marshmallow like centre. It is this contrast in textures that makes this dessert such a delight to eat. Top it with whipped cream, a reduced berry sauce and seasonal summer fruits and you can see why this is such a mouthwatering recipe.
The very first time I baked a pavlova I remember taking a bite into it and hating how sweet it was; it made me feel sick to my stomach because it was drowned in sugar. I developed this recipe for those of us who like to enjoy sweet treats, without feeling sick afterwards, lol! The addition of less sugar means that the crust on this pavlova is not nearly as hard and crusty as in other recipes (which use twice the amount of sugar), so this means you do have to bake this pavlova for a little longer than other pavlovas to ensure it is baked well on the outside and does not seep afterwards.
There are a few golden rules to remember when baking pavlovas or meringues in general.
- Ensure all your equipment is free from fat or grease as this will prevent the egg whites from reaching their maximum volume when whisked. Glass and metal bowls are best for this, avoid using plastic as it can hold onto grease.
- Eggs used for this recipe (or any other baking recipe for that matter) should always be used at ROOM TEMPERATURE, not from the fridge.
- When separating the eggs, ensure the eggs yolks don’t contaminate the egg whites. The smallest amount of egg yolk in the egg whites will prevent the egg whites from being whisked into a foam.
- Try to use caster sugar where possible as this dissolves easily into the egg whites and will prevent the pavlova from weeping once baked (weeping means the pavlova oozes a clear sticky syrup after being baked).
- Bake the pavlova in the centre of the oven to avoid the outside cooking and browning too quickly and the inside remaining raw.
- Allow the pavlova to cool in the oven completely after baking. Only take it out of the oven once cooled to prevent the pavlova from cracking excessively (due to the change in temperature), some cracking is quite normal.
- Weeping pavlovas can be caused by undissolved sugar in the meringue mixture, over beating the egg whites or under cooking the pavlova, something to bear in mind if you do find your pavlova weeps after baking.
As noted in point 6 above, this dessert is best made well in advance as it needs to cool completely inside the oven after baking with the door closed. This makes it ideal for baking ahead of time when you are entertaining, all the components can be made a day in advance (minus cutting the fruit) and it can be assembled on the day. This means that you should allow yourself plenty of time to bake this.
I don’t always use cream of tartar in my pavlovas but did so on this occasion; they say adding vinegar or some sort of acidic ingredient, such as cream of tartar, helps to stabilise the egg whites and helps retain its volume. I can’t say that I noticed any discernible difference by adding this but should this be your first time baking a pavlova, it’s a good idea to add a small teaspoon of an acidic ingredient like lemon juice, vinegar or cream of tartar as added insurance for a successful bake.
If you wanted to try alternative toppings you could try canned fruits cooked in honey (canned peaches are great for this) sprinkled with chopped nuts (any nut will work but pistachios contrast really nicely with this). I’ve yet to add my Beauty And The Peach recipe here, but will do so soon. Without any further ado, I hope this pavlova leaves everyone around your dinner table asking for more!
Serves – 8
You will need: for Afelia’s Fruity Summer Pavlova
4 egg whites (from medium sized eggs)
a pinch of salt
1/2 tsp cream of tartar
1 tsp vanilla essence
2 tsp cornflour
130g caster sugar
a punnet of fresh strawberries
a punnet of fresh blueberries
For the berry sauce:
75g mixed frozen berries (I used frozen cherries on this occasion but mixed berries work well too)
1/2 tsp cornflour
1 tbsp water
2 – 3 tsp sugar
For the whipped cream:
1 pot double cream (approx 300ml)
2 tbsp sugar
Method:
Preheat your oven to gas mark 1 or 130 degrees Celsius.
Ensure you have read the notes above before proceeding to separate the eggs.
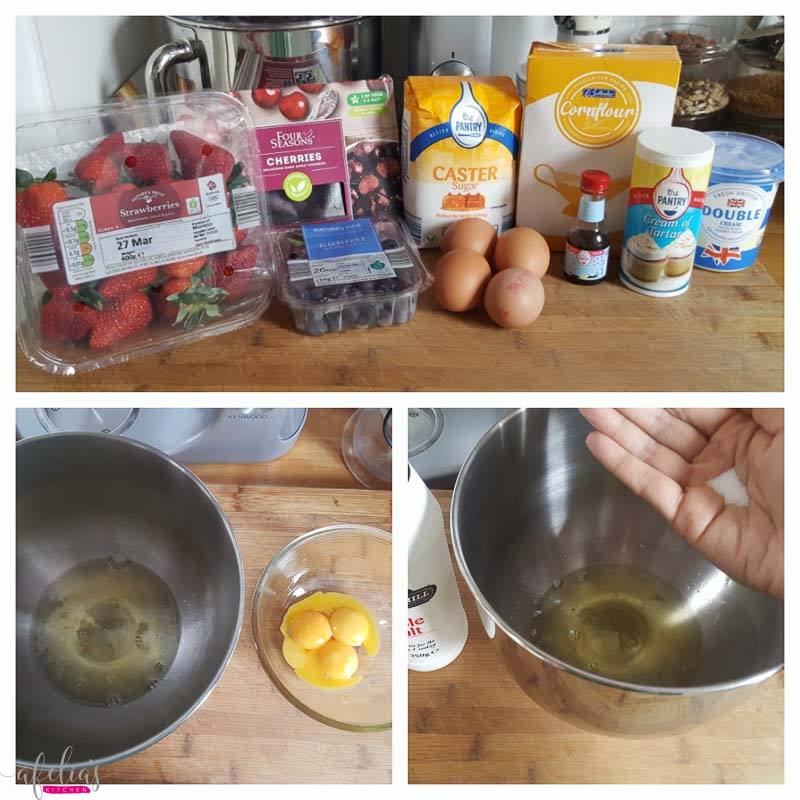
Start by separating 4 medium sized eggs, place the yolks in one bowl and egg whites in another. Don’t throw the yolks away, use it to make some custard or Hollandaise sauce.
Add a pinch of salt to the egg whites.
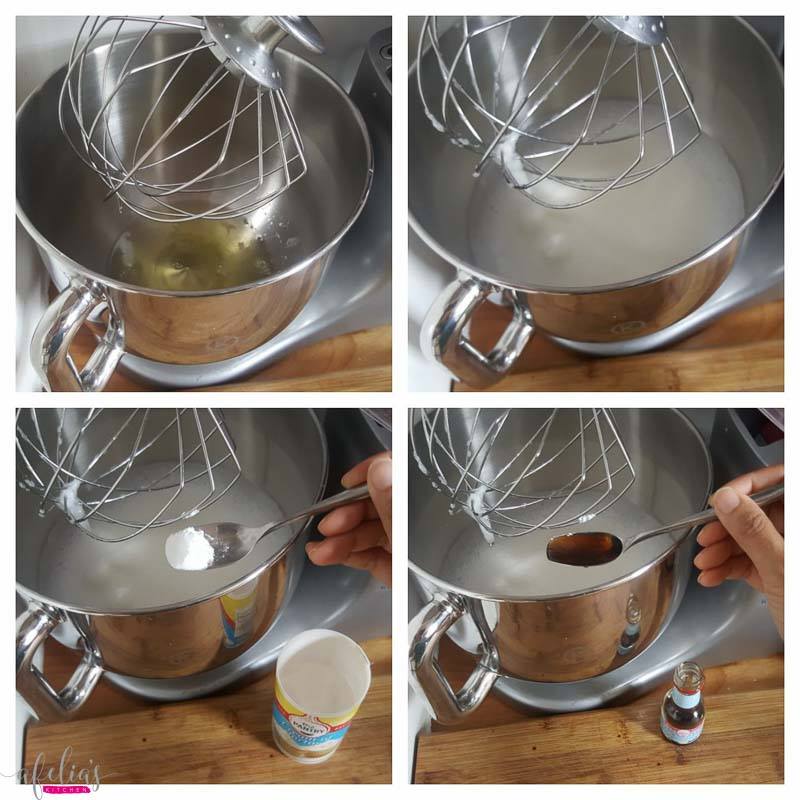
Attach the balloon whisk to your stand mixer (or use a handheld mixer) and whisk the egg whites till they look soft and foamy (top right photo).
Add 1/2 tsp of cream of tartar, 1 tsp vanilla essence….
….and 2 tsp of cornflour.
Continue to whisk the egg whites till they form soft peaks that hold their shape (top right photo).
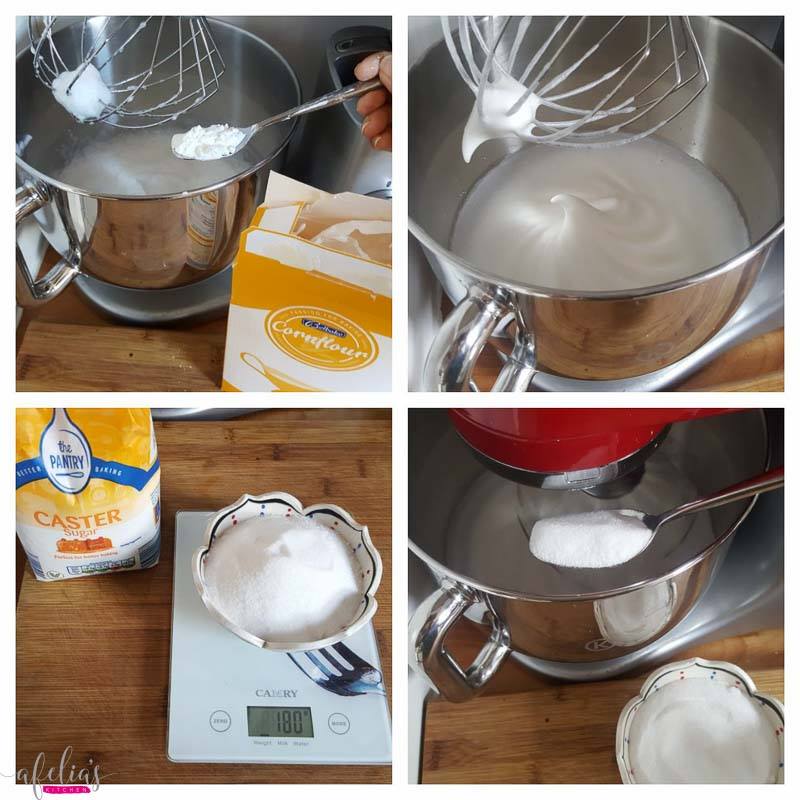
Next measure 130g of caster sugar.
Add 2 tbsp of sugar at a time to the whisked egg whites, thoroughly whisking at low speed and incorporating the sugar before adding more, keep adding sugar like this until you’ve used it all up.
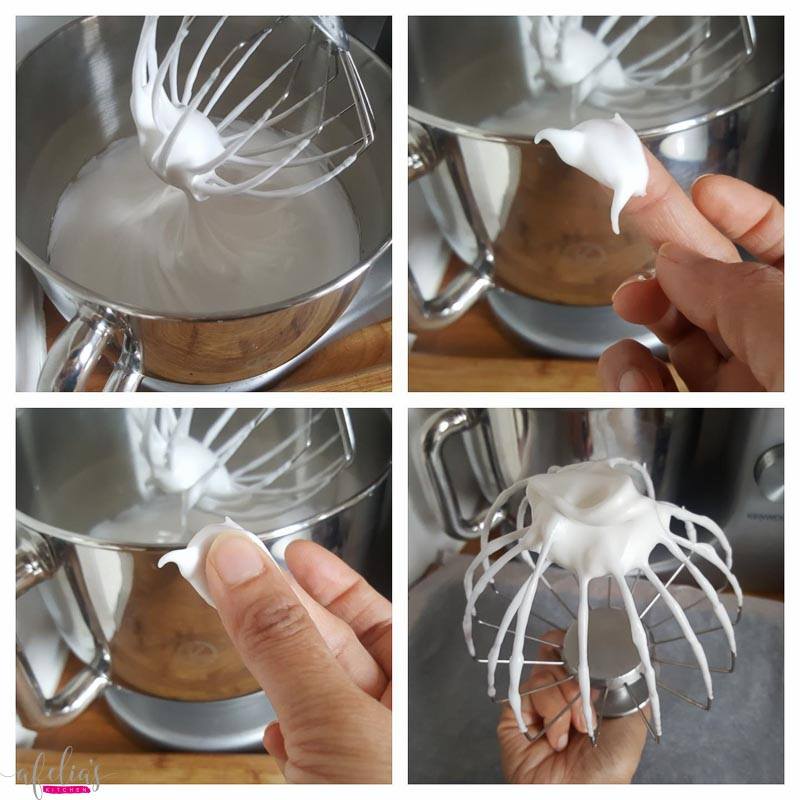
You should notice the egg whites become thicker and glossier in texture as you incorporate the sugar (top left photo).
Once all the sugar has been added test the mixture to see if it is smooth and the sugar has been dissolved. If it is smooth proceed to the next step, if it is still grainy, whisk it some more on a low speed setting.
The mixture should hold its shape/peaks when held upright, as I am doing in this photo (bottom right photo).

Next take a flat tray and place a piece of greaseproof paper on top.
Using a large bowl draw a circle with a pencil onto the paper, this will act as a guideline for you when you place the mixture on the paper. I turn the paper over to ensure the mixture doesn’t come into contact with the lead from the pencil.
Dot some of the pavlova mixture on the corners of the baking tray and place the greaseproof paper on top, this will hold the paper in place for you.
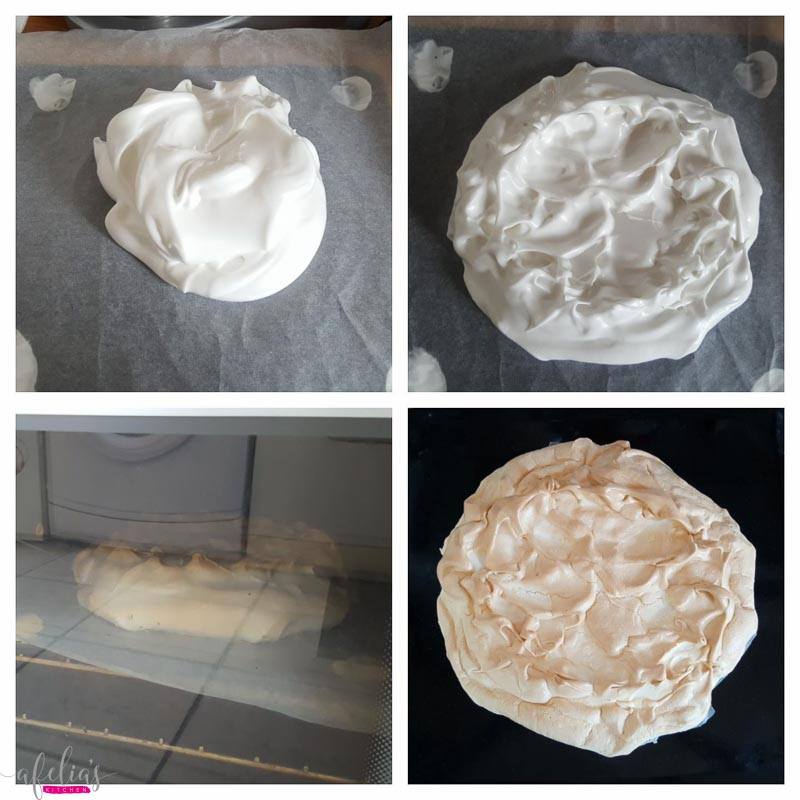
Place the mixture in the centre of the marked circle and using a spatula work it outwards.
Shape the pavlova like a bowl; the sides of the pavlova should be higher than the middle and the centre should be slightly lower in order for it to hold the whipped cream and fruit once baked (top right photo).
Bake the pavlova in a preheated oven on gas mark 1 for 1.5 hours, don’t be tempted to open the door before this time is up. After baking leave the door closed and allow it to cool completely before removing, this will help prevent the outside cracking excessively due to the change in temperature.
Once cool remove the greaseproof paper from the bottom of the pavlova.
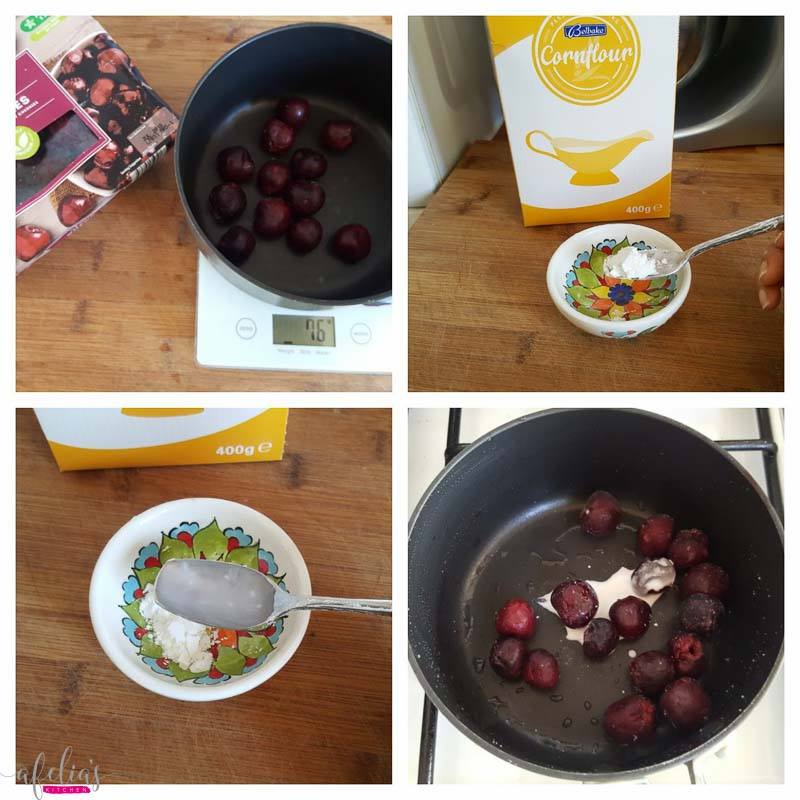
Prepare the sauce by measuring 75g of frozen berries of your choice straight into a saucepan, I am using seedless frozen cherries.
Dissolve 1/2 tsp of cornflour with 1 tbsp of cold water, add this to the frozen cherries.
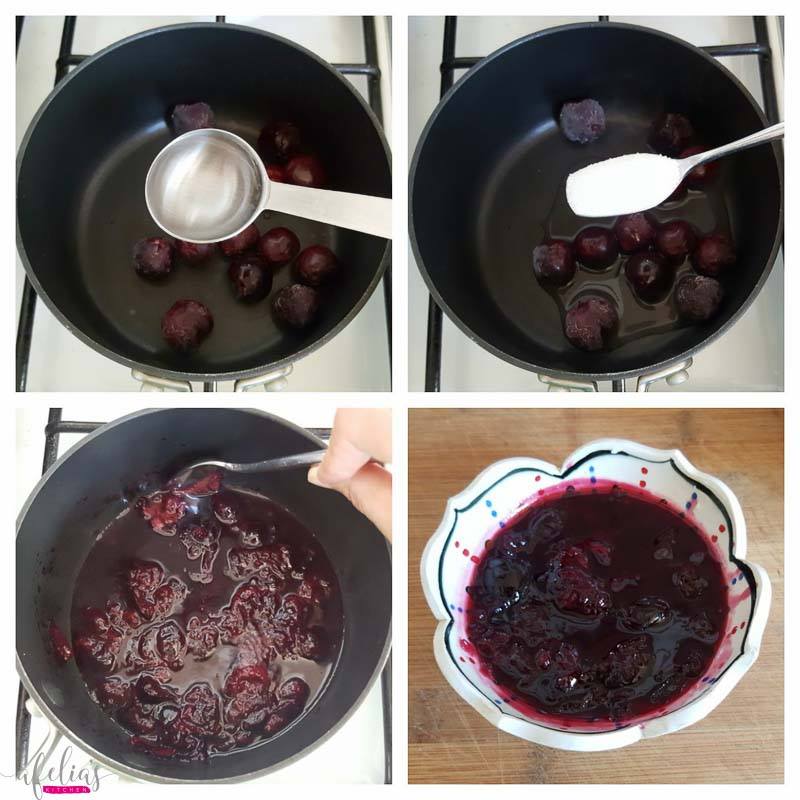
Add another 1 tbsp of water to the saucepan along with 2 – 3 tsp of sugar.
Bring the mixture to a boil until the sauce becomes thick and sticky (bottom left photo), then transfer to a dish to cool until needed.
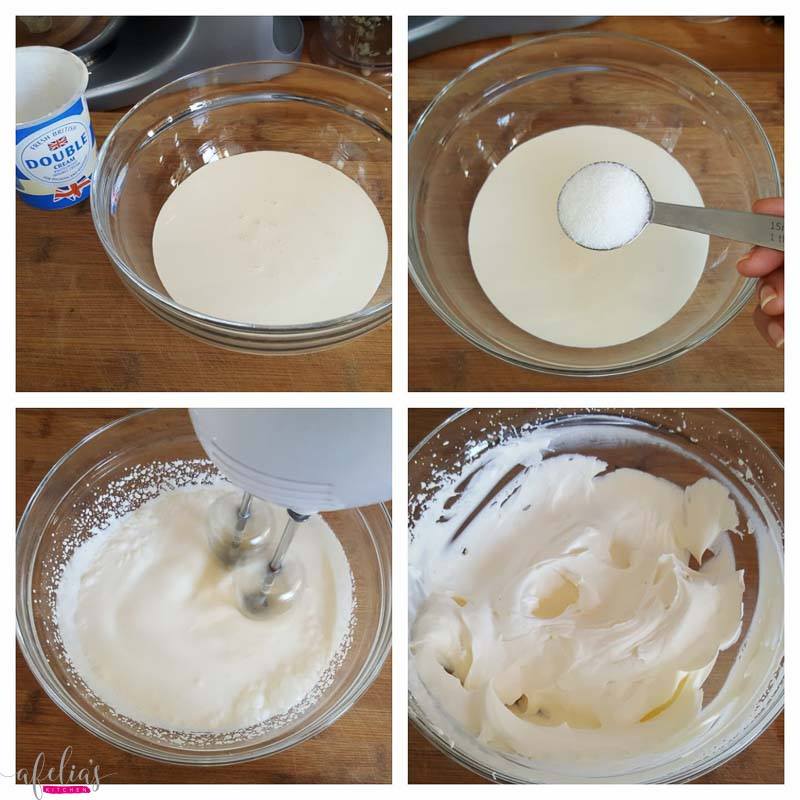
To prepare the whipped cream; pour one pot of double cream in a clean bowl, add 2 tbsp of sugar and whisk using a whisk or handheld mixer till the cream forms soft peaks (bottom right photo).
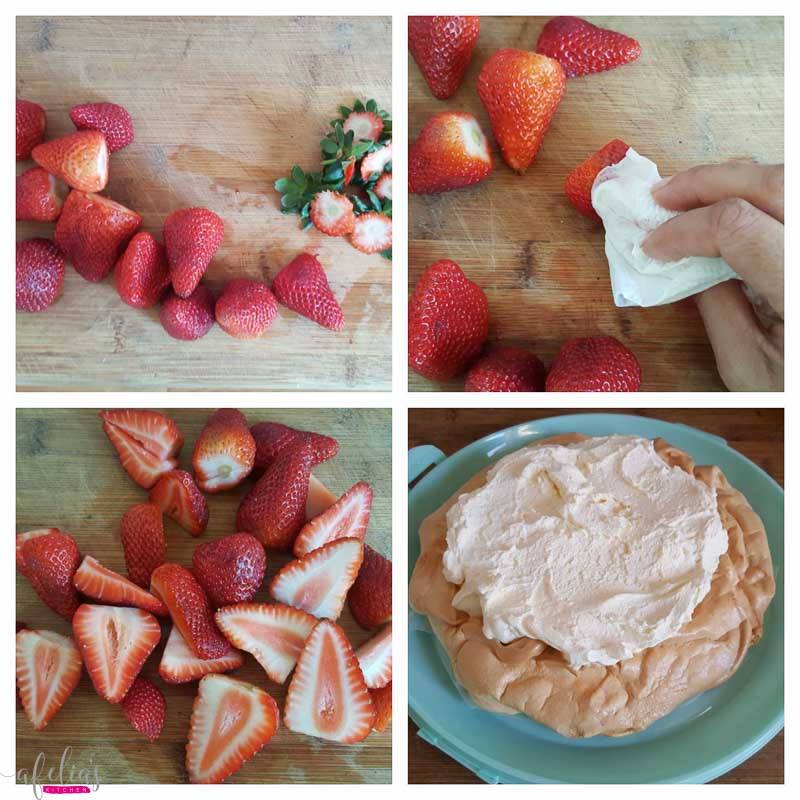
Wash your strawberries and remove the calyx.
I like to dry the outside of the strawberries using a clean kitchen towel to prevent the strawberries becoming mushy from being washed.
Cut the strawberries in half and leave until you are ready to assemble the pavlova.
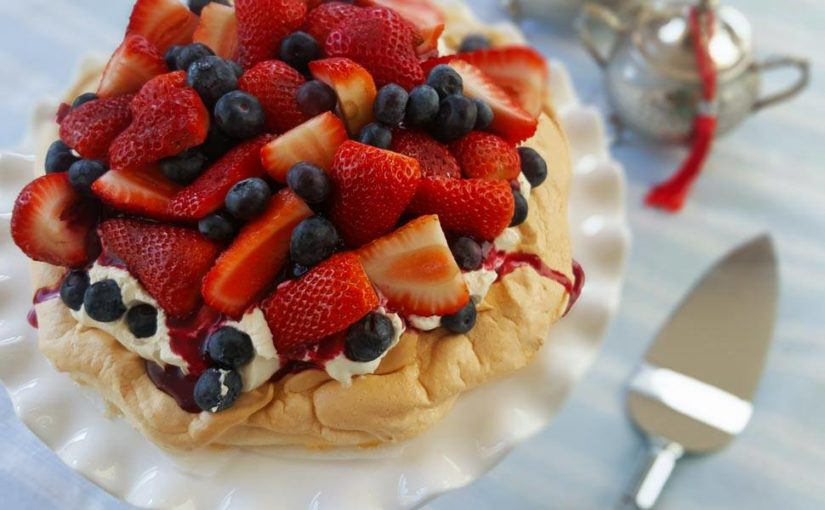
Assemble the pavlova by spreading the whipped cream over the top….
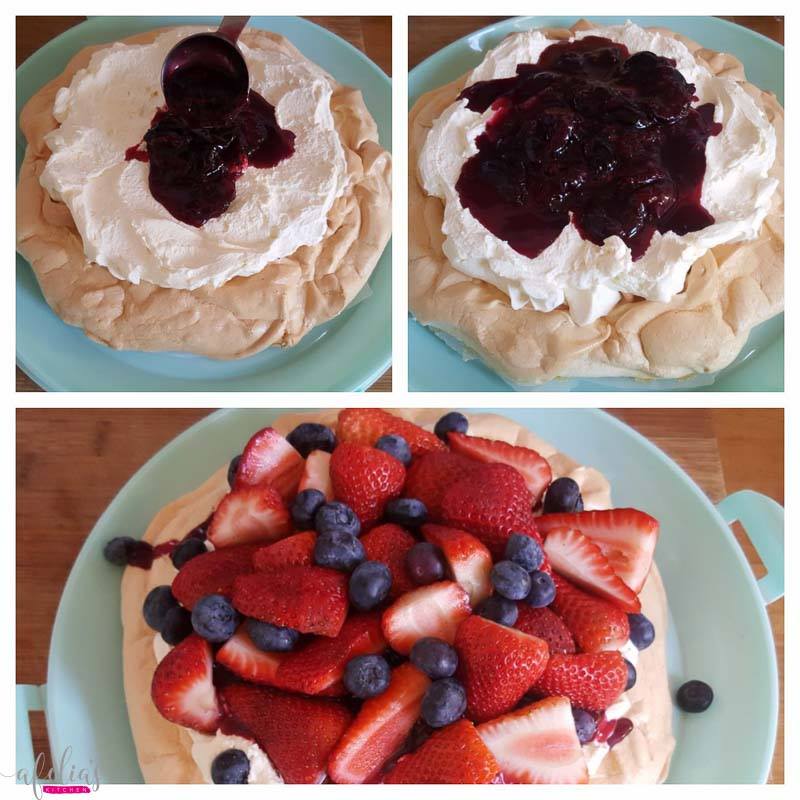
….then pour the berry sauce on top. Finally top with the fresh strawberries and blueberries.
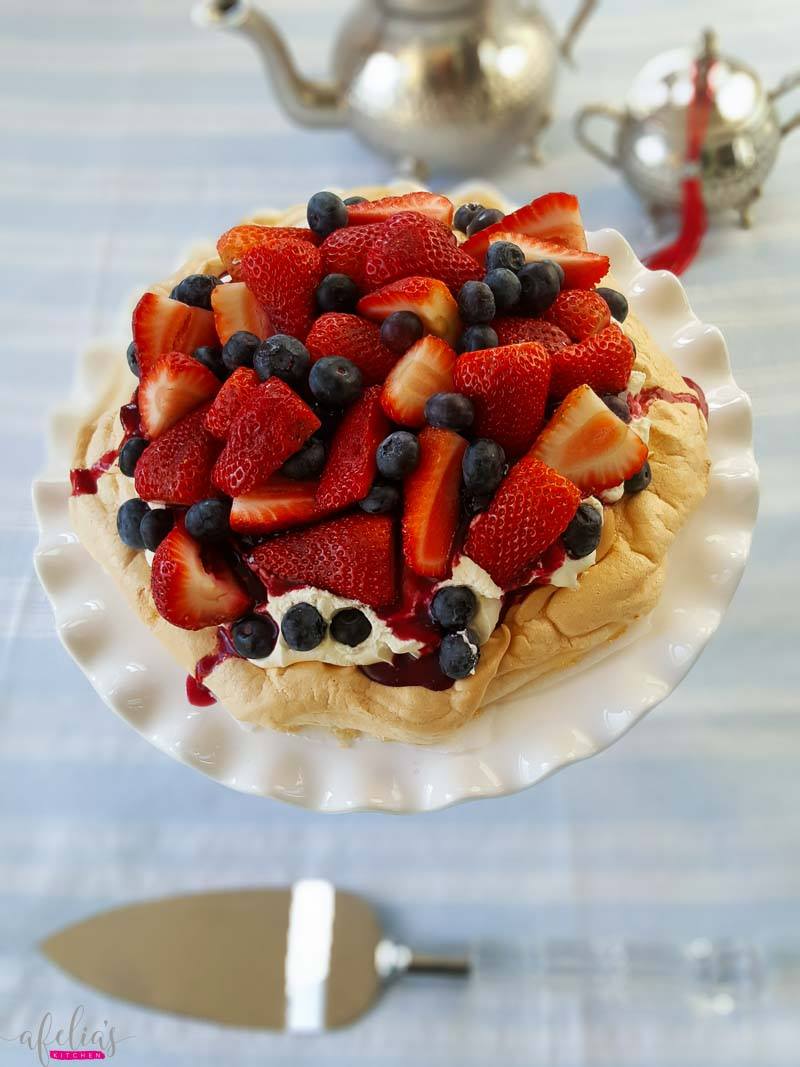
Appreciate how beautiful the pavlova looks before serving, because once served, it won’t look anything like this, lol!
Enjoy your Fruity Summer Pavlova and all the hard work that went into baking it, it’s SO worth it!
Bon Appetit!
- 4 egg whites (from medium sized eggs)
- a pinch of salt
- ½ tsp cream of tartar
- 1 tsp vanilla essence
- 2 tsp cornflour
- 130g caster sugar
- a punnet of fresh strawberries
- a punnet of fresh blueberries
- 75g mixed frozen berries (I used frozen cherries on this occasion but mixed berries work well too)
- ½ tsp cornflour
- 1 tbsp water
- 2 - 3 tsp sugar
- 1 pot double cream (approx 300ml)
- 2 tbsp sugar
- Preheat your oven to gas mark 1 or 130 degrees Celsius.
- Ensure you have read the notes above before proceeding to separate the eggs.
- Start by separating 4 medium sized eggs, place the yolks in one bowl and egg whites in another. Don't throw the yolks away, use it to make some custard or Hollandaise sauce.
- Add a pinch of salt to the egg whites.
- Attach the balloon whisk to your stand mixer (or use a handheld mixer) and whisk the egg whites till they look soft and foamy (top right photo).
- Add ½ tsp of cream of tartar, 1 tsp vanilla essence....
- and 2 tsp of cornflour.
- Continue to whisk the egg whites till they form soft peaks that hold their shape (top right photo).
- Next measure 130g of caster sugar.
- Add 2 tbsp of sugar at a time to the whisked egg whites, thoroughly whisking at low speed and incorporating the sugar before adding more, keep adding sugar like this until you've used it all up.
- You should notice the egg whites become thicker and glossier in texture as you incorporate the sugar (top left photo).
- Once all the sugar has been added test the mixture to see if it is smooth and the sugar has been dissolved. If it is smooth proceed to the next step, if it is still grainy, whisk it some more on a low speed setting.
- The mixture should hold its shape/peaks when held upright, as I am doing in this photo (bottom right photo).
- Next take a flat tray and place a piece of greaseproof paper on top.
- Using a large bowl draw a circle with a pencil onto the paper, this will act as a guideline for you when you place the mixture on the paper. I turn the paper over to ensure the mixture doesn't come into contact with the lead from the pencil.
- Dot some of the pavlova mixture on the corners of the baking tray and place the greaseproof paper on top, this will hold the paper in place for you.
- Place the mixture in the centre of the marked circle and using a spatula work it outwards.
- Shape the pavlova like a bowl; the sides of the pavlova should be higher than the middle and the centre should be slightly lower in order for it to hold the whipped cream and fruit once baked (top right photo).
- Bake the pavlova in a preheated oven on gas mark 1 for 1.5 hours, don't be tempted to open the door before this time is up. After baking leave the door closed and allow it to cool completely before removing, this will help prevent the outside cracking excessively due to the change in temperature.
- Once cool remove the greaseproof paper from the bottom of the pavlova.
- Prepare the sauce by measuring 75g of frozen berries of your choice straight into a saucepan, I am using seedless frozen cherries.
- Dissolve ½ tsp of cornflour with 1 tbsp of cold water, add this to the frozen cherries.
- Add another 1 tbsp of water to the saucepan along with 2 - 3 tsp of sugar.
- Bring the mixture to a boil until the sauce becomes thick and sticky (bottom left photo), then transfer to a dish to cool until needed.
- To prepare the whipped cream; pour one pot of double cream in a clean bowl, add 2 tbsp of sugar and whisk using a whisk or handheld mixer till the cream forms soft peaks (bottom right photo).
- Wash your strawberries and remove the calyx.
- I like to dry the outside of the strawberries using a clean kitchen towel to prevent the strawberries becoming mushy from being washed.
- Cut the strawberries in half and leave until you are ready to assemble the pavlova.
- Assemble the pavlova by spreading the whipped cream over the top....
- then pour the berry sauce on top. Finally top with the fresh strawberries and blueberries.
- Appreciate how beautiful the pavlova looks before serving, because once served, it won't look anything like this, lol!
- Enjoy your Fruity Summer Pavlova and all the hard work that went into baking it, it's SO worth it!
If you like the recipe please share with friends and family, also follow me on Facebook and Instagram. Questions? Leave a comment below or message me on Facebook.


Shahista Sabjee
Slmz. If im using an electric oven at what temperature shud i bake the pavlova n for hw long.
afelia’s kitchen
Salaam, you can find plenty of online temperature converters, just look at one of those. x
Taslima Begum
Hey sis, i tried this recipe for the first time and I got to say it came out delicious. I didn’t have a electric whisk so had to do it by hand. It was all worth the hard whisking. Thank you for sharing the recipe. Xxxx